I built a Corsi-Rosenthal box
2022-Nov-02, Wednesday 03:38 pm It's easy if you follow the instructions, so of course I went rogue and made mistakes. I'll explain them here so you don't have to make the same ones. :) I apologize in advance for the imperial length measurements. That's what we have available in stores in the USA, even though I'd much prefer switching to metric.
The design concept is sound, and it's even supported by 3M which makes Filtrete brand filters. If you really need to cut costs, then you can create a triangle or prism design with only 2 filters instead of 4. The upward-pointing box design has better air flow filtration, though.
I had good reason to deviate from the pattern, but it did make things more difficult. My old Honeywell HEPA filter is about 27 years old, so it needed replacing anyway. It did such a great job (except for being extremely noisy) that I decided to go with another Honeywell motor, and I chose the HF-910 floor fan because I heard it was relatively quiet. I chose four Filtrete 20x20x1 allergen filters because that's what happened to be available at the store that day. You could probably find cheaper in bulk purchases somewhere. The instructions recommend 2-inch widths instead of 1-inch, and that would make for a more sturdy frame, although mine is fine without young children around to crush it.
- Buy a box fan, not a round fan, of 20" size blade diameter. You gain an extra 1 or 2 inches of structural width from the filters you buy, and they will support the frame of the fan. It would be much easier to add "corners" of cardboard to a box fan rather than cutting ever-larger round holes trying to approximate the best fit for a round fan.
- Buy a fan with the controls on the FRONT or TOP or SIDE, but definitely not on the BACK of the fan where they would be inaccessible inside the completed frame. (Narrator: "Of course, these controls were on the BACK.")
- Keep the cardboard box that the fan shipped in! I had to go buy a cardboard box large enough. (Narrator: *knowing glance at audience*)
- Use an old pair of scissors that are already dull to cut the cardboard. No need to mess up something still in good shape.
- If the fan controls are on the BACK of the fan, set it to the lowest setting before taping up the box. (Narrator: "He didn't.") Otherwise, you'll have to remove the bottom, set the fan control to its lowest setting, then replace the cardboard on the bottom of the box.
 It works! It's running in my bedroom now, and it's much less noisy than my very old HEPA filter. It's bulky, but that's fine. I like it.
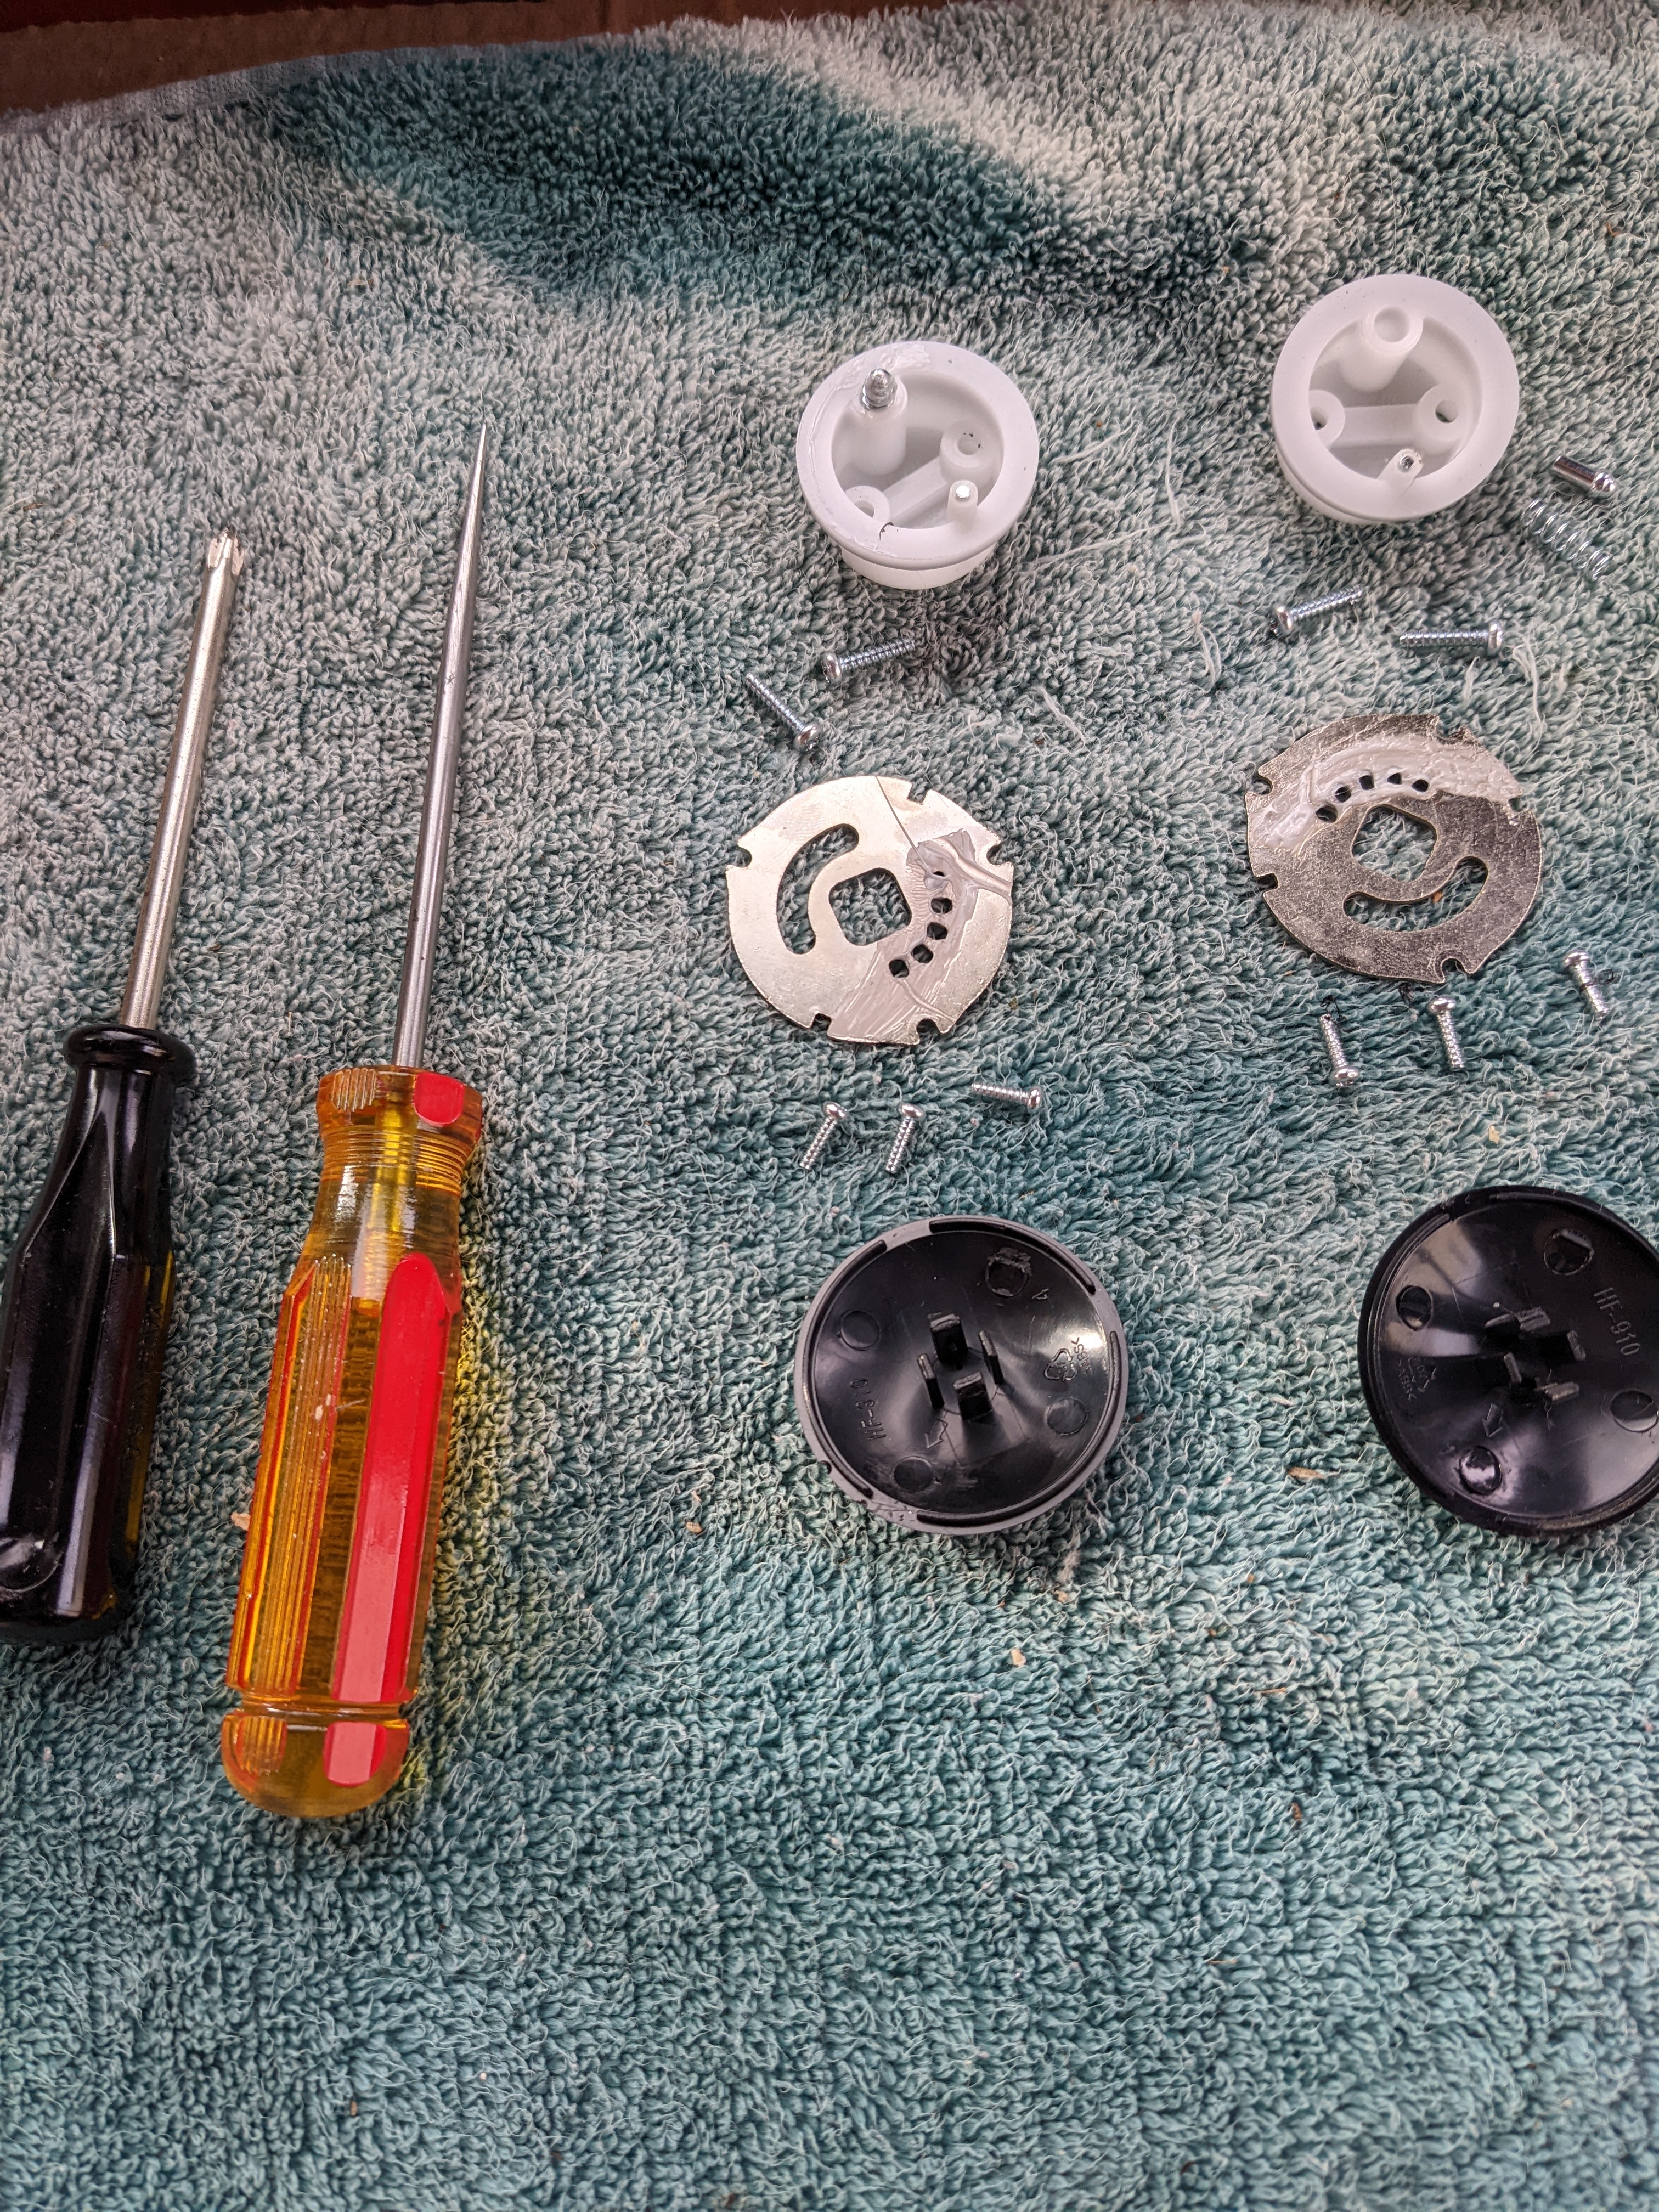
Again, following the instructions, it's actually pretty easy. Because I didn't follow them, however, I spent a lot of time on distractions like figuring out how to remove the floor base from my round fan. I unscrewed all 10 screws on the front blade protector, thinking the axis support screws would be inside the frame. (Narrator: "They were not.") Not finding them, I had to reassemble the fan again. Turns out, I only had to use an ice pick to pop off the base endcaps, then it was just a matter of removing some screws and a gear.
I added this picture of the parts for my own benefit. Next year, when it's time to replace the filters, I might want to get a box fan and devote this device to its originally-designed floor fan duty. In that case, I need to remember what parts I took out and where they go. I already have them in a labeled bag, taped to the base for safe keeping.
It's a good use for some of the birthday money that my parents sent me. I went shopping for parts on the same day I deposited that check. Happy Birthday (tomorrow) to me, with a fun Build-It-Yourself adventure (today).
no subject
Date: 2022-Nov-02, Wednesday 11:48 pm (UTC)no subject
Date: 2022-Nov-03, Thursday 04:00 am (UTC)no subject
Date: 2022-Nov-03, Thursday 10:33 pm (UTC)no subject
Date: 2022-Nov-04, Friday 07:58 am (UTC)